"Build"
building your pc

Welcome to the building section of this website. This is by far the hardest and most time consuming portion of making your computer. Make sure that you have bought the right components at Parts and also, make sure that you have got the right tools for this process next to you.


OK, now you should be ready!

The Power Supply
Step 1: Place your power supply in the mounting position. Most cases are designed for the PSU to be installed with the fan facing down, letting it pull cool air from outside the case, but check your manual if you're unsure.
Step 2: Attach it to your case using appropriate screws, or thumb screws.
Step 3: If your power supply is a modular PSU, plug in the power cables that you need for your various components. If you're not sure, though, don't worry, you can plug them in later as and when needed. If your PSU is not modular, you'll have all the cables already installed.

The Processor (CPU)
Step 1: Carefully remove the motherboard from its antistatic bag and set it on a hard, flat, nonmetal surface such as a wooden desk, or the top of the motherboard box itself. Also, make sure there are no sources of dust or liquid nearby. Even though installing a CPU is an easier task now than it was in previous years, it’s still precarious. There are numerous pins on the CPU and/or motherboard, and bending any one of them could render that component kaput.
The process isn’t designed to be difficult, and as long as you follow the instructions clearly and keep an eye out to ensure the chip is fully seated before you clamp it in place, you’ll be fine. However, there are some subtle differences in the process depending on who made your CPU.
Step 2: Although the design of Intel and AMD CPUs are a little different, the process for installing them is much the same, no matter which kind of processor and motherboard you have. Intel CPUs have flat metal contacts on the underside, and the pins reside inside the socket, whereas AMD CPUs have pins on the underside of the processor, and contacts in the socket. In either case, do not bend or touch the pins.
The square metal bracket holding the CPU in place is the load plate, and it’s raised and lowered using the load lever. When clamped down, the end of the load lever tucks under a hook to keep everything in place. When you unbox your motherboard, the contact array will be covered with a piece of plastic. This plastic will pop out once you open the bracket, so wait to open it until you’re ready to install your processor.
First, open the load plate. Do this by gently pushing down on the load arm and moving it out sideways from under the hook, and then raising it up all the way. The hook’s lever action opens the plate, which you can easily flip up. At this point, the plastic piece will come loose. If it doesn’t pop out, gently remove it.
Step 3: To install the CPU, you need to line it up correctly. On most Intel CPUs, you'll have notches on the side that allow you to only place the CPU in one orientation. On the latest 12th-generation Intel CPUs, you get a little golden triangle in one corner to help you align it properly. The same is true of all modern AMD processors.
Pick the processor up by its sides and align it correctly using whatever aids you're given, and gently place it into the CPU socket. Double-check alignment, and give the processor a little nudge to make sure that it has slotted in correctly. If in doubt, remove it and try again just to be sure.
Step 4: Once you're happy that the CPU is correctly installed, press the retaining arm down firmly, but gently, until the CPU is locked in place. This can take quite a bit of pressure, but it shouldn't be hard. If in doubt, check again that the CPU was seated correctly before locking it down.
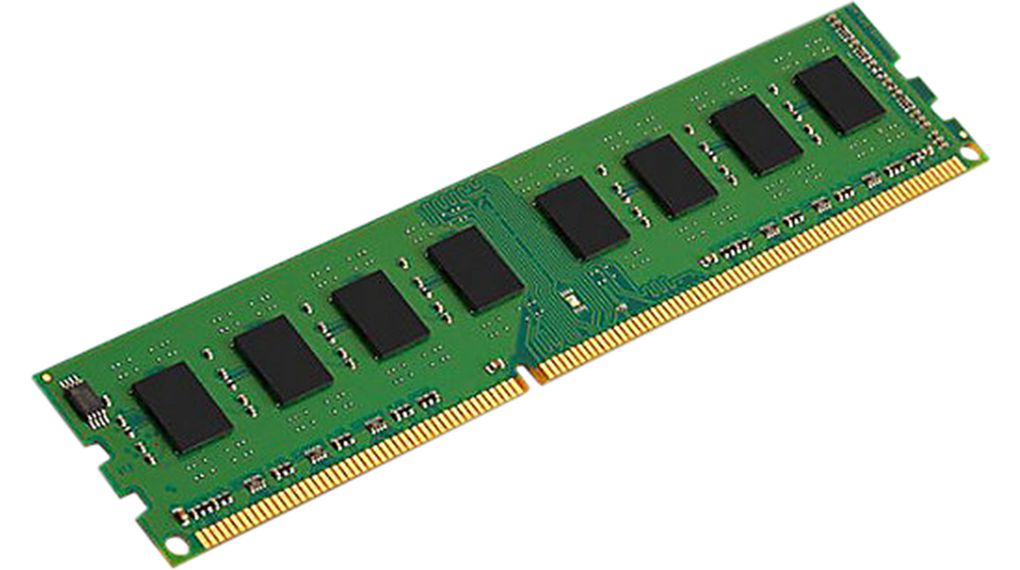
The RAM
Step 1: When you know which slot to install your RAM in, push the plastic wings at either end of the slot down and outward (some motherboards only have one), then place the stick in the slot sticking straight up. Push down firmly until the RAM clicks into the slot, and the plastic wings click back in and clamp the ends of the sticks.
Be sure that your motherboard is well supported across its entire surface, as it is possible to put too much pressure on the motherboard when installing RAM if you push too hard. This is unlikely, but as with any steps in this guide, take care, and if in doubt, double-check everything before proceeding.
Step 2: Repeat the same process for each stick you have until all of your RAM is installed.
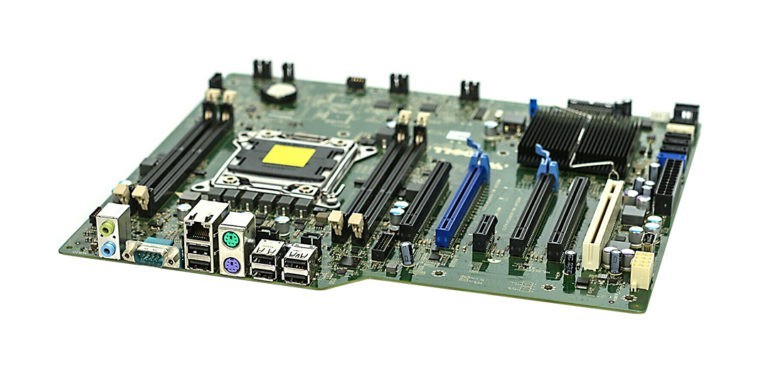
The Motherboard
Step 1: Take your motherboard's rear I/O panel from the box — it looks like a small cutout of all the different motherboard ports — and install it in the back of your case by orientating it properly, and pushing it in. Double-check that it aligns with your motherboard's outputs before plugging it in if you're not sure which way it goes.
Step 2: To install the motherboard, you have to screw it into the insulating standoffs that prevent your components from shorting. Some cases come with these preinstalled, while others need you to install them yourself. They’re easy to identify because they look unusual — essentially screws that have another screw hole on top instead of the typical screwdriver notch. They’re usually gold or black.
If necessary, screw in your motherboard's standoffs into the correct holes depending on the size and layout of your motherboard. You can look at your motherboard to figure it out, or install them where your manual suggests.
Step 3: Place your motherboard into your case, and push and wiggle it into place so that it slots into your I/O panel and has all of its screw holes lined up with the motherboard standoffs underneath.
To attach your motherboard to the case, screw it in. First, seat the screws and give them a couple of precursory turns. Then, proceed in a star pattern, tightening each screw a little at a time. Don’t go wild while tightening as you might damage the board. You only need enough torque to hold the board in place without it wiggling.
Step 4: Once the motherboard is seated comfortably in the case, there are a few necessary connections.
The motherboard’s main power connection is a wide, two-row cable that fits snugly into a similar-looking spot on the board itself. This 20-28 pin connector powers both the motherboard and the CPU. However, some boards have a second 4-pin or 8-pin connector for the processor, which resides near your CPU, typically in the top corner. If you have it, you’ll need to plug that in, too.
Connect the case plugs and buttons to the motherboard. A double-wide row of pins — the location of which will be noted in your manual — runs the USB ports, buttons for reset and power, and activity LEDs for power and storage.
These small cables run in a bundle from wherever the ports reside in the case. Proper installation can be difficult, however, due to their size. If you have a magnifying glass or a set of tweezers, now is a great time to use them. Some motherboards include an adapter that bridges these jumpers to the right connections on your motherboard. Otherwise, installing them is as simple as matching the labels on the pins with the labels on the connections.
The USB header connecting to your front-facing motherboard ports will be on its own. This connection is around eight by two pins, and they’re enclosed in a larger plastic housing. This header has a notch on one side that should clearly indicate which direction it plugs in.
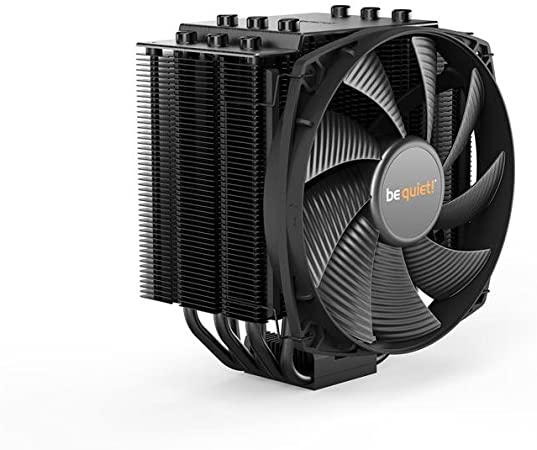
The (CPU) Cooler
Every cooler needs thermal paste. You don't have to use the best thermal paste, but make sure you use some. It typically looks like a silver paste and comes either preapplied to the cooler, or in a short syringe tube.
If you're reapplying heat paste, be sure to remove the original heat paste with a lint-free cloth and a little isopropyl alcohol.
When your CPU is ready, Apply a pea-sized amount to your CPU in the center.
Step 2: If your CPU cooler requires it, remove your case's other side panel and attach the custom backplate design. You may need to remove the stock backplate from the motherboard first.
Step 3: Place the CPU cooler on top of the processor, and press down gently. Line up any retaining brackets or bolts with the CPU cooler mounting holes on the motherboard.Install the retaining screws/brackets to secure the cooler in place. If you have to tighten several screws, be sure to do them a couple of turns at a time in a cross pattern, so that you don't put too much pressure on one portion of the CPU. Make sure that they are tight enough that the CPU cannot wiggle around, but don't overtighten.
Step 4: If your cooler has a separate fan, attach it now, and plug its 3pin or 4pin connector into the CPU cooler port on the motherboard. It should be located near the CPU cooler.
If you're installing an AIO watercooler, mount the radiator at an appropriate point in the case (at the front or rear air intakes/exhaust are common) and attach the fan's header to the correct port.
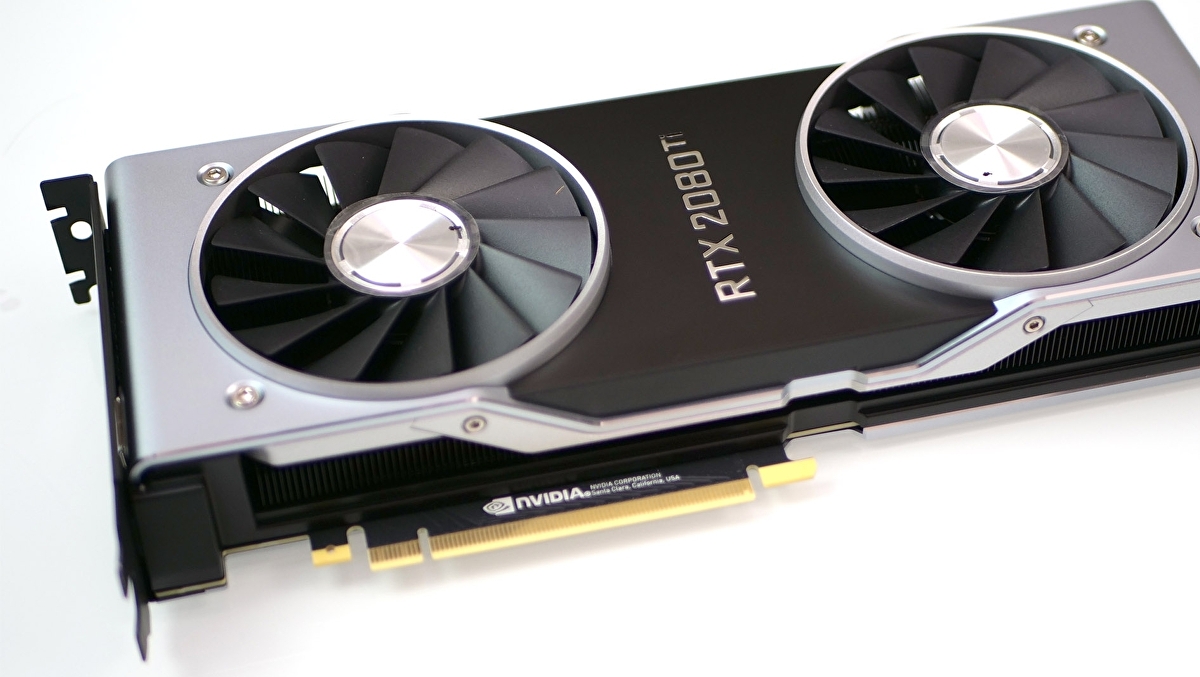
The Graphics Card (GPU)
Step 1: Modern graphics cards use a PCI-Express (PCIe) x16 slot. It’s a long, thin connector located on the rear of the motherboard, below the processor. For the vast majority of motherboards, you’ll want to use the top PCIe x16 slot.
To seat the card in that slot, you’ll need to remove one, two, or, in some cases, three rectangular backplates from your case. It’s one of many thin metal brackets lined down the back of the case to keep it sealed up. Do this by removing the screw(s) that secures the backplate(s) to the chassis. Once removed, the plate should slide (or fall) out freely.
Keep the screw, as you’ll need it in a moment.
Step 2: Grab your graphics card and, making sure the ports are aligned to the rear of the case and the PCIExpress connector is facing down, carefully slot it into the motherboard. You should hear a click when the motherboard locks it into place, but that's not always the case on every motherboard.
You don’t need excessive force, so if you encounter a great deal of resistance, take another look at the backplate and PCIe slot to make sure both are clear and the motherboard is properly aligned. Also take note if there is a pushpin that locks the card in like your memory slots, as some motherboards use it as a safety measure.
Step 3: Use the screws pulled from the metal brackets to fasten the back of the card into the same spot in the case. Again, they don’t need to be extremely tight — just enough to hold the card firmly in place.
Step 4: Most graphics cards need more power than the PCIe slot provides. If your card needs extra juice, you’ll see one or two PCIe power connectors on the card’s side facing away from the motherboard or, in some cases, on the top of the card. This can be a traditional six- or eight-pin PCIe power connector, or a new mini-12pin.
Find the appropriate connector on your power supply, sometimes labeled VGA, and slot it in. The connector’s design prevents improper installation, so if the connection isn’t easy, double-check your alignment to make sure it’s correct.

Hard Drives (SSD)or(HDD)
Step 1: To install a hard drive, find the 3.5-inch drive mounting point(s) in your case. These can be full hard drive cages with multiple mounting points, or it might be just space for a single drive with screw holes right in the case. If in doubt, refer to your manual.
Slot your drive into the appropriate place and screw, or lock it into place using your case's mounting system. When in place, attach the SATA data cable to the drive and the motherboard, and attach the SATA power connector to the drive.
Step 2: To install a SATA SSD, repeat the same steps as the larger hard drive, only change the mounting point to an appropriate 2.5-inch cage or slot. Make sure that it is secured in place, and attach both the SATA power and data cable.
Step 3: To install an M.2 NVMe SSD, locate the appropriate slot on your motherboard. It will be labeled, but it is pretty small, so check your manual if you're unsure.
Remove the retaining screw and slot the drive in at a 45-degree angle. Gently, but firmly push down on the drive until it clicks into place, then replace the retaining screw.
Step 4: To install a PCIe SSD, choose an appropriate PCIe slot on your motherboard. The 16x slots will offer the most bandwidth, but that may not be necessary for your particular drive's bandwidth. Consult the drive's manual for confirmation on which is best for your particular motherboard.
Angle the drive with the gold contacts down, then gently push it into the PCIe slot. It should click into place when it is locked in. It shouldn't take much force, so if it gets stuck, check the alignment.
Attach any necessary additional power cables.
This should be it! thanks for reading this guide by DigitalTrends. Make sure to double check EVERTHING, and once you are done move onto the Start up section of this website where you can coplete this long and exciting process.


